When developing a mobile application using React Native, it's common to require different configurations for various environments like 'Staging' and 'Production'. Such configurations allow you to have different settings for API endpoints, feature flags, and other environment-specific variables.
This guide will walk you through the process of setting up 'Staging' and 'Production' environments in a React Native project, covering both Android and iOS platforms.
Creating Environments in React Native for Android
In Android, 'Flavours' give developers the flexibility to create different versions of an application from a single codebase. Here's how you can create 'Staging' and 'Production' flavours:
-
Open your React Native project in Android Studio
-
Navigate to your
build.gradlefile within theandroid/appdirectory -
Define your product flavors for 'Staging' and 'Production'
    android {
    ...

    productFlavors {
        staging {
            applicationIdSuffix ".staging"
            resValue "string", "app_name", "MyApp Staging"
            // Additional staging-specific configurations
        }
        production {
            // Production-specific configurations
        }
    }

    ...
    }
- Sync your Gradle files
Creating Schemes in iOS
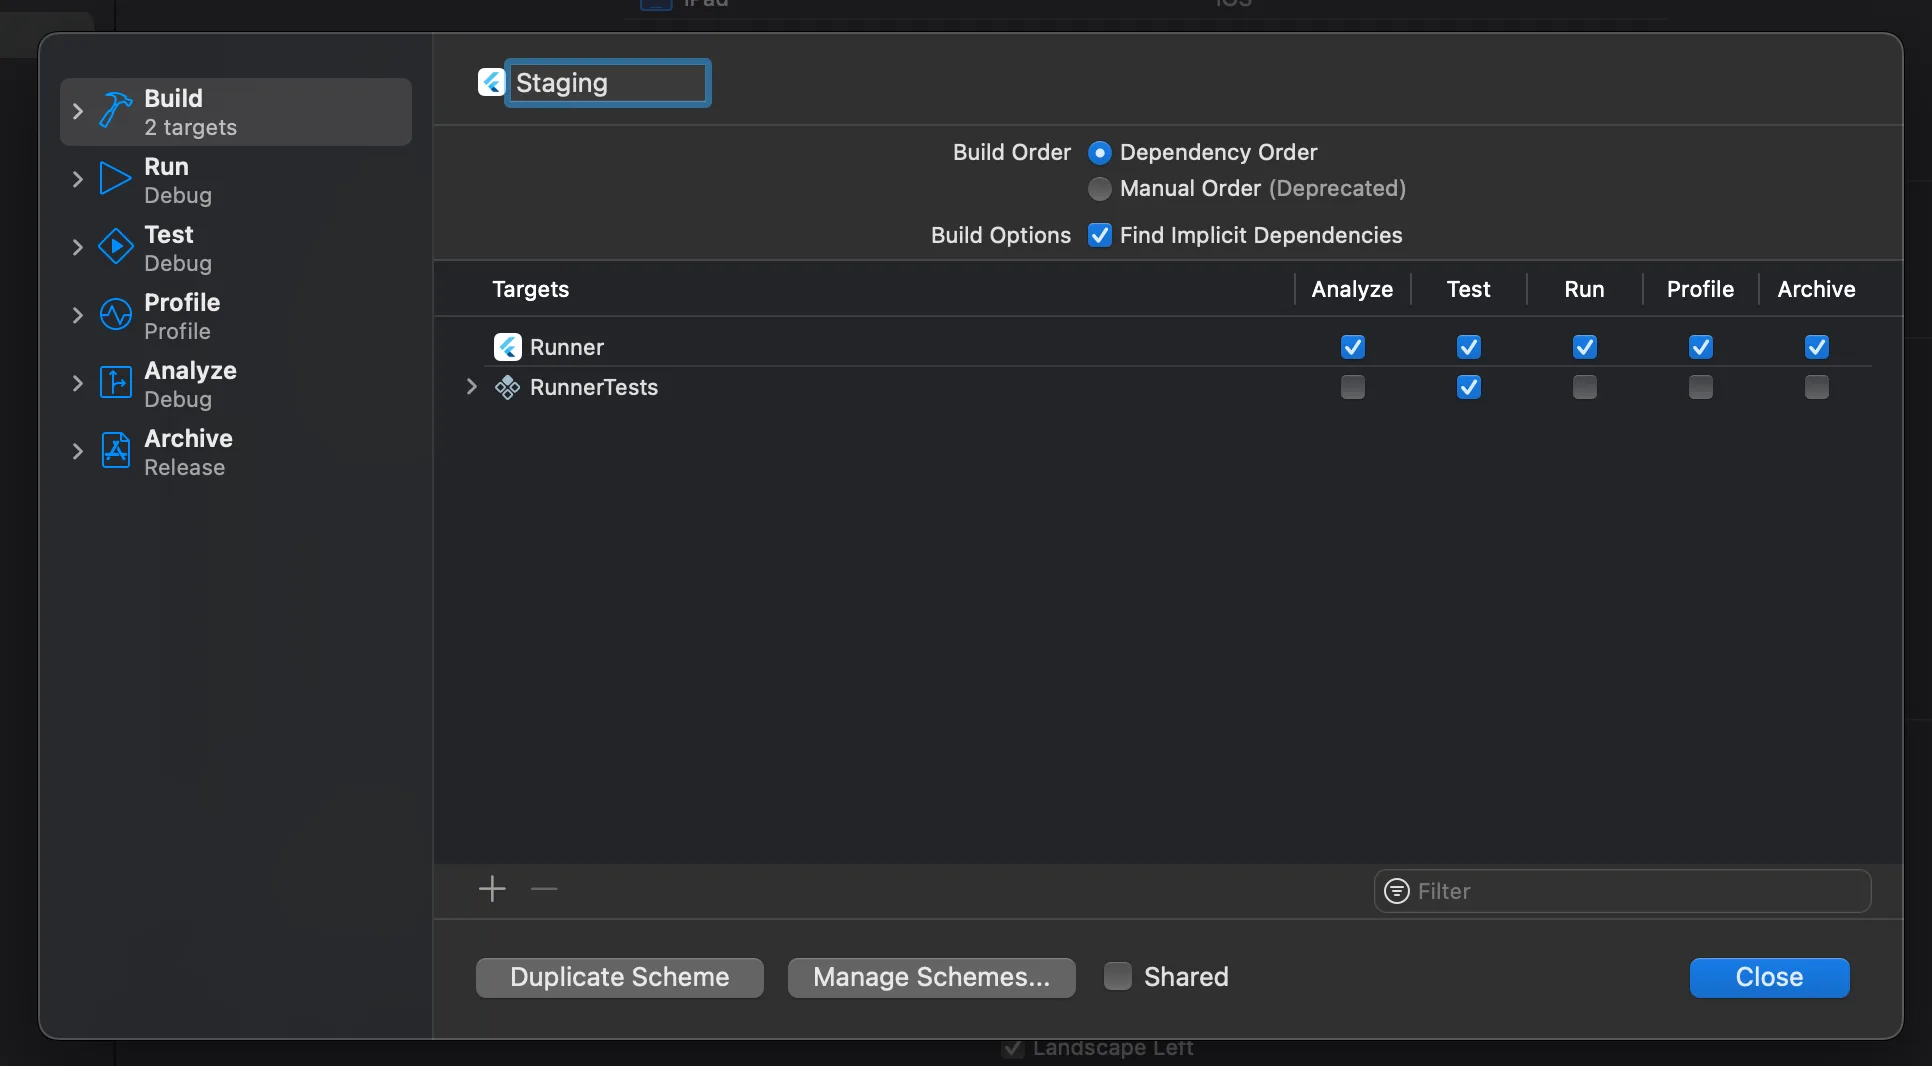
In iOS, 'Schemes' dictate how your app is built and run. Here's how to create 'Staging' and 'Production' schemes in Xcode:
1- Open your project in Xcode
2- Navigate to the scheme manager
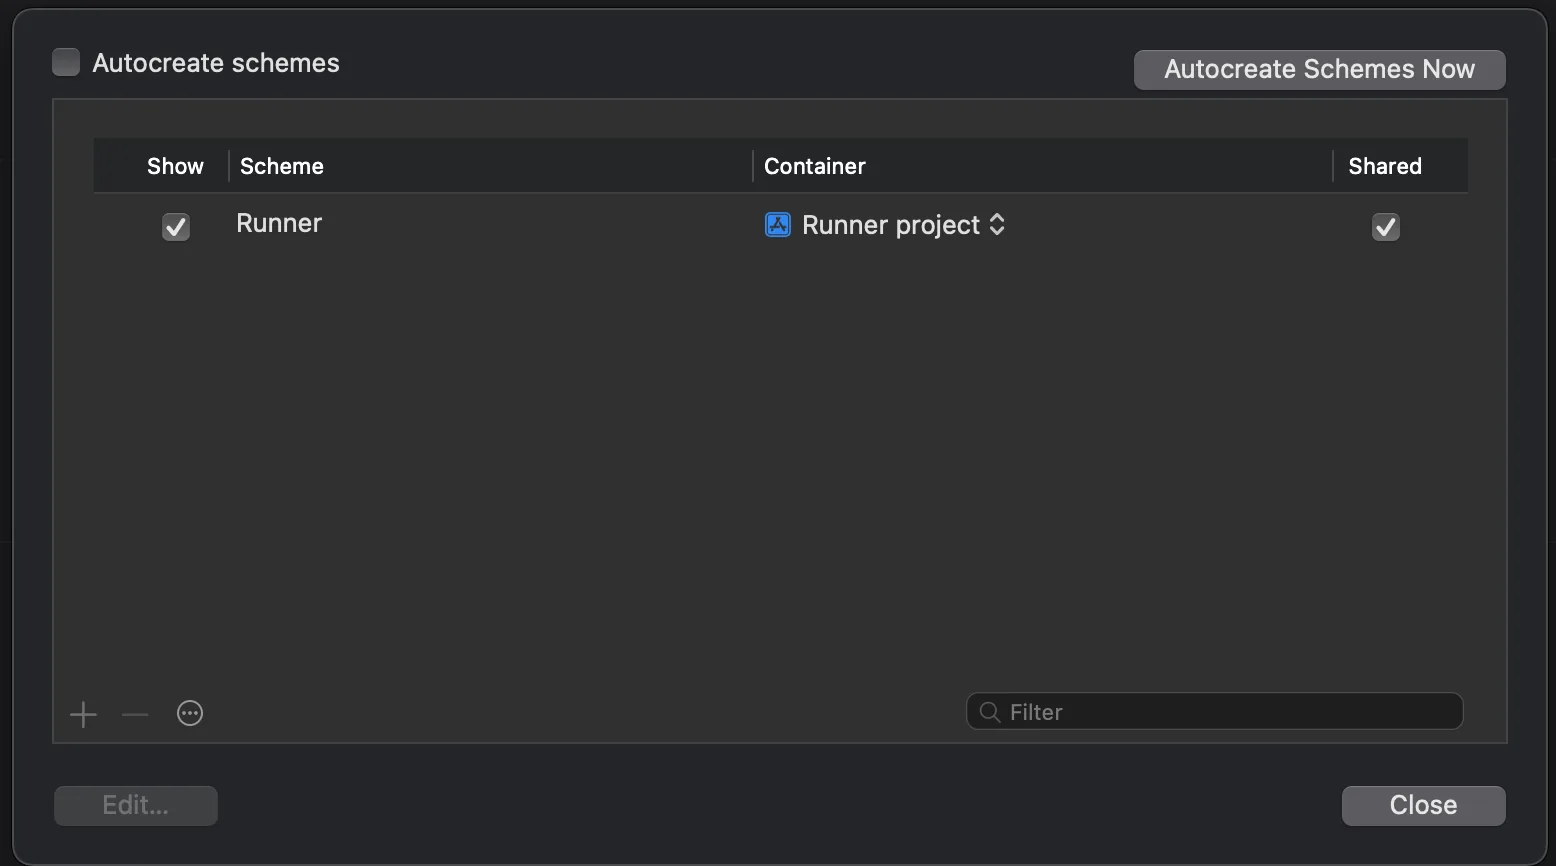
3- Duplicate your existing scheme

4- Name your new scheme
5- Set the build configuration
6- Repeat steps 3-5 to create a Production scheme
Configuring Environment Files Using React Native Config
react-native-config is a popular package that allows you to manage different environment variables. Here's how you can set up and use this library to manage 'Staging' and 'Production' environments in React Native.
First, you'll need to install the package:
npm install react-native-configsor if you're using Yarn:
yarn add react-native-configNow installl the pod again using npx pod install
Create two files in the root of your project, .env.staging for staging environment and .env.production for production environment.
    .env.staging
    API_URL=https://staging.api.example.com


    .env.production
API_URL=https://production.api.example.comIn your Android build configuration, you can specify which environment file to use for each build variant:
    project.ext.envConfigFiles = [
        stagingDebug: ".env.staging",
        stagingRelease: ".env.staging",
        productionDebug: ".env.production",
        productionRelease: ".env.production"
]In iOS, you can utilize different schemes to load different environment files:
- Go to your scheme's build settings in Xcode.
- Add a pre-actions to your scheme and write bash script to add env file
echo ".env.staging" > /tmp/envfile
Running Different Variants in Android
Once you've set up the 'Staging' and 'Production' product flavors in your Android build configuration, you can easily build and run these variants. Here's how:
-
Select the Build Variant in Android Studio
-
In the bottom-left corner of Android Studio, open the 'Build Variants' tab.
-
Select the variant you wish to build and run (e.g.,
stagingDebugorproductionDebug). -
Build and Run the Selected Variant
-
Click the 'Run' button (a green play icon) in the toolbar to build and run the selected variant on your device or emulator.
Running Different Schemes in iOS
For iOS, you can run different schemes that you've previously set up for 'Staging' and 'Production'. Here's how to do that in Xcode:
-
Select the Scheme in Xcode
-
Next to the 'Stop' button in the toolbar, click on the current scheme to open the scheme menu.
-
Select the scheme you want to build and run (e.g., 'Staging' or 'Production').
-
Build and Run the Selected Scheme
- Press the 'Run' button (a play icon) in the toolbar or press
Cmd + Rto build and run the selected scheme on your device or simulator.

Running Different Environments in React Native CLI
If you prefer to use the command line to run your React Native project, you can also do so:
- For Android
    react-native run-android --variant=stagingDebug
react-native run-android --variant=productionDebug- For IOS
    react-native run-ios --scheme="Staging"
    react-native run-ios --scheme="Production"